On a related note, my friend Emily was having a 2nd birthday party for her little boy. The theme? Well, Elmo, of course! She was lamenting the other day that she needed an Elmo shirt for him to wear at the party. Somehow, I agreed that I could make it. I could make it, couldn't I?
I decided to go with a fabric applique. I had played around a bit with appliques for a Christmas project and I was fairly certain I could come out with something decent. I was very pleased with how it turned out...what do you think?

I worked with felt on this applique and I loved it! After some googling, I discovered that felt seemed to be a pretty popular medium for appliques and I can totally see why. It is fairly forgiving when you cut it out, it adds great texture...it is just a great material to work with.
After deciding on felt for the fabric, I played around a little bit with trying to sketch out my applique on my own. Let's just say...I am not an artist. Stick figures are a stretch for me. Finally, I had a stroke of genius and discovered that for $1.50, I could buy someone else's Elmo pattern on Etsy and trace it onto my heat transfer paper. Sold...best $1.50 I ever spent.
This is what the pattern looked like after I cut it out of the pdf file from the Etsy seller. (I made my own pattern for the party hat and number 2. I can draw a triangle!)

I used Steam-A-Seam made specifically for appliques.

I simply stuck the transfer webbing onto the felt piece I wanted to work with and then traced the pattern piece onto it.

I did this with each piece of the pattern on their respective colors of felt. This is what my little Elmo looked like after all the pieces were cut out.

In addition, I cut out a little triangle party hat and the number "2". The Steam-A-Seam was awesome and with just a little bit of heat from my iron, Elmo stuck really, really well to the t-shirt. I wanted to reinforce him, though, by stitching around the outline of the applique. In the past, I have used my zig-zag stitch to finish off my appliques with modest success. In my googling about appliques, I discovered a tutorial that mentioned she found great luck in using her button-hole feature. This concept seemed genius to me - the button-hole function would provide much tighter little stitches to outline my applique. So, this is what I did. It works beautifully and will be my go-to stitch for appliques in the future. It is time-consuming and tedious to outline the entire applique, but pays off in the finished product.
This was my original finished product:
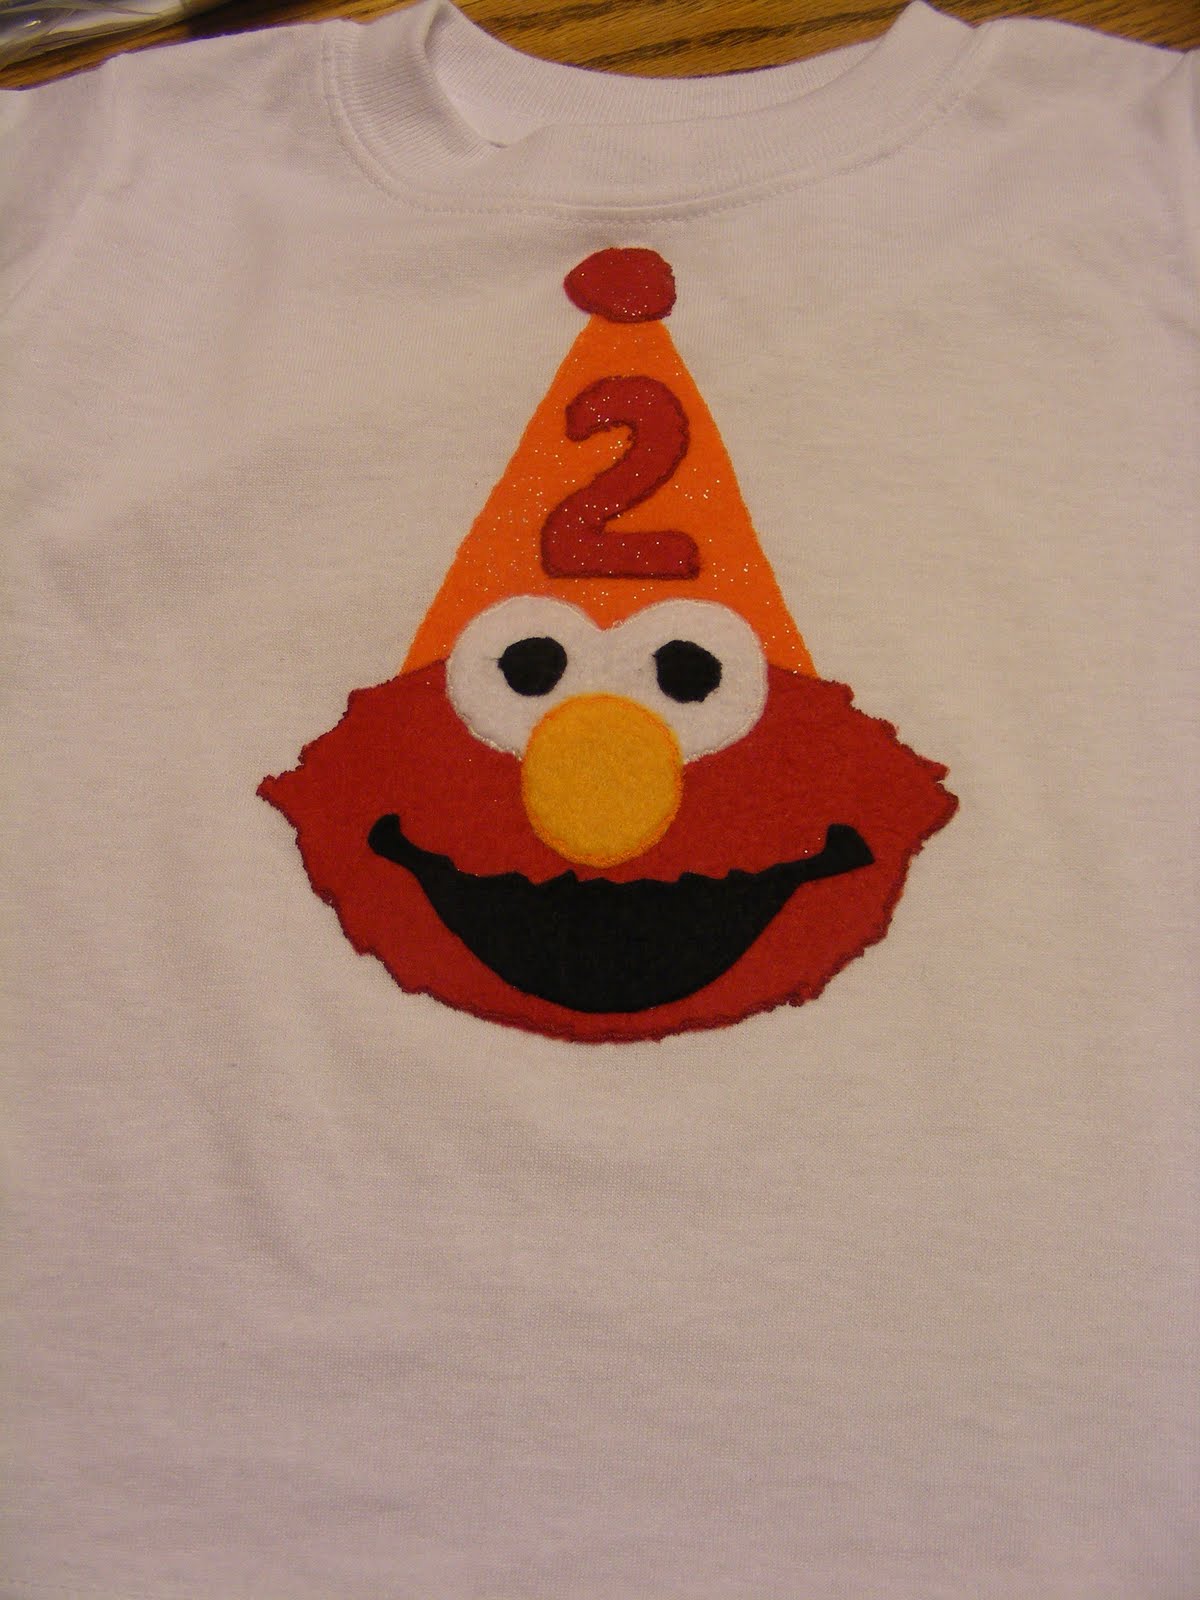
I was happy with this, but the little red ball at the top of Elmo's hat was really bothering me. You can't tell so much in the picture, but the circle is oddly shaped. Turns out felt melts fairly easily under the heat of the iron and I kind of melted a side off the ball of the hat. It looked just "okay". Then, I had an idea...

Red pom-poms. I pinned one on the top of Elmo's hat with a tiny little safety pin (for removal when washing). Cute, cute, cute and that melted little ball on the top of Elmo's hat no longer bothered me. It looked as though I planned it!

I am really excited about my felt applique discovery along with my button-hole stitching. Thinking of all the cute things I could make for the girls with this idea. And, who knows...maybe I will get to break out my Elmo pattern again. We might just be having an Elmo-themed birthday party in October. What 2 year old doesn't love Elmo?
This was a ton of work my friend....the shirt was a HUGE hit at the party. Thanks for taking the time to do this. Now that you have linked to my blog, I should post so pix and write something.
ReplyDeleteEmily, I was hoping you would post some party details with all the fun stuff you made! Now the link will force you!
ReplyDelete