Wednesday, May 18, 2011

School's Out! School's Out!

Well, this week marks the end of my girls' "school year".  School is the term we use for our girls' two-morning-a-week Mother's Morning Out program at church.  School has been my sanity this year.  I cannot begin to tell you how I look forward to 9-12 on Monday and Wednesday.  Some days I just wander through the aisles of TJ Maxx and revel in the fact that I am not pushing my double stroller.  At the beginning of the year, when my girls were a little less reliable in their solid night-sleeping, I will not lie...some mornings I went back to bed!   I have had breakfast with my husband, I have gotten my hair cut and colored...I could go on and on about the those magical six hours in my week!  To say that I appreciate those women who care for my children would be the understatement of my year.  That being the case, I have officially entered the end-of-the-school-year hand wringing over how to show my appreciation.  Let's be realistic.  I am not rolling in money.  My girls have five...yes FIVE teachers in their class.  I want to show them my appreciation, but it is probably going to be a small token of my appreciation, monetarily speaking.

I decided on a small gift card to everyone's favorite lunch spot - Chick fil A.  You can't go wrong there.  But, I wanted to include a heartfelt note letting my girls' teachers know how much their care for my children has meant to me.  I stumbled upon an idea at this cute little blog for a ruffled tulle card.  I decided to adapt the idea for my thank you note.  I love how it turned out!


I had some unused half-sheet note cards already.  As luck would have it, I had a roll of matching tulle left over from a little tu-tu making project I did a while back.  I cut my tulle off the roll at approximately 8 inches.


I folded the 8 inch piece in half length-wise.  I ran the folded piece through my sewing machine with my stitch length and tension set as high as it would go.  This is a quick little technique for creating a perfect little ruffle every time.


As you can see, the tulle ruffles-up (is that a real term?) as it passes under the foot of the machine.  You can then use the loose threads to adjust and even-out your ruffles.  Then, I simply sewed my little ruffle onto my notecard.  Did you know you can sew onto card stock?  I was not aware until I saw the tutorial!  It really works! (I went back to a normal stitch and adjusted back my tension and stitch length.)


The finished product.


I added my own little personal note of appreciation and slipped my dolled-up notecard in a lime green envelope for a pop of color.


Oh yes, and I added a little gift card as well!


A small token of my appreciation, but heartfelt nonetheless!

Wednesday, May 11, 2011

May Flowers

Well, I've been sitting at the sewing machine again!  I just love taking on a new sewing project - especially when it is something cute for my girls.  Here's the latest:


This shirt combines two of the hottest things in the "sewing world" these days...ric-rac and fabric rosettes.  I followed this tutorial for the rosettes if you want step-by-step instructions - I'm just hitting the highlights with my post.  So, so easy.  Again this project was great for me because it didn't require a lot of precision!  Notice a trend in the projects I pick to tackle?!?  I simply pinned the ric-rac in place and sewed it on by stitching down the middle.


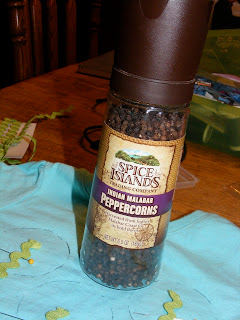
I outlined the circles I would sew my rosettes into.  I couldn't find exactly the right size for my "bloom" and I finally ended up using my pepper grinder!  Perfect size.


My fabric strips were cut to 1 1/2" and sewn together with a 1/4" seam allowance.  They were approximately 44" long.  (This is more than long enough.  I ended up cutting quite a bit off at the end that I didn't use.) When I flipped them right-side out using a safety pin (as instructed in the tutorial), they looked like this.


Then, you just sew and sew and sew in a circle using your outlined pepper grinder as a guide.  You can make little folds in the fabric to make the curve in the rosette.  It is really pretty easy and forgiving if you aren't just perfect.


I think it turned out pretty cute, huh?

Tuesday, May 3, 2011

Welcome

Someone has been busy playing with their new birthday toy!  I am thrilled with how this door turned out.  Let's hope it holds up to the direct sunlight it gets in the afternoon...